Brytecore provides lead analytics to agents and companies in the real estate industry. They deliver their advanced machine intelligence directly to the point of contact with leads.
This means providing multiple solutions for integration with Brytecore's data collection and intelligence. Sometimes this is right on a website, but for larger companies, it might require native mobile libraries.
To help these clients, Brytecore needed a solution that was easy to integrate, and in the case of Android, easy to include within the application build process.
Android libraries can also be useful tools if you find yourself reusing code throughout your project - or across multiple projects. To use a published Android Library, you’ll need to upload it to a distribution center like Bintray. The following steps describe how to create an Android Library, upload it to Bintray, and publish it to JCenter.
1. Create an Android Library Project
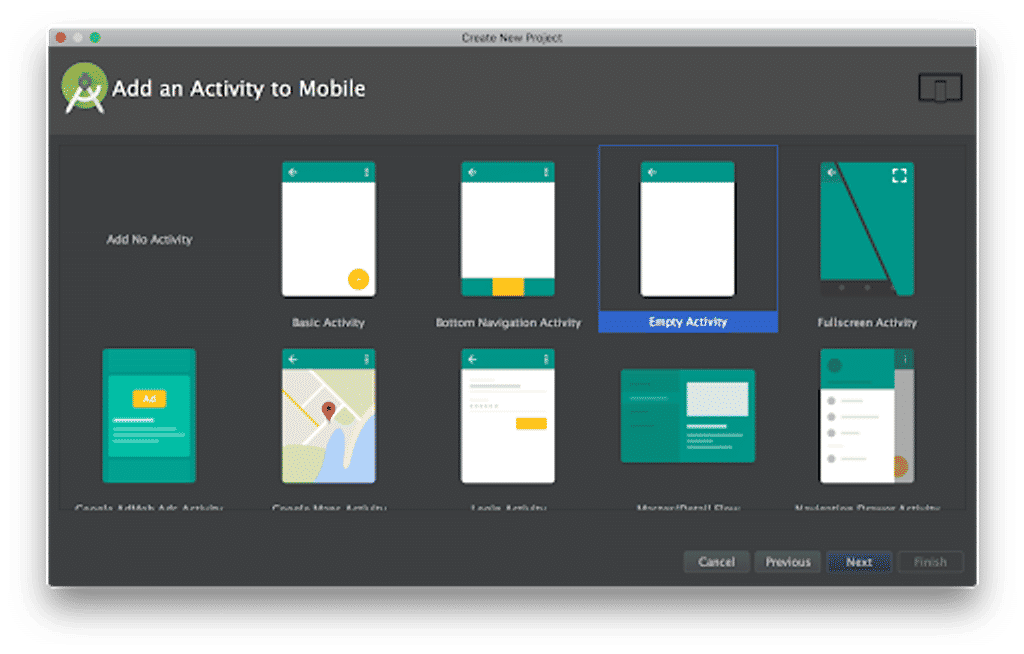
To upload an Android Library to JCenter, you first need to make sure that the project is in the correct format. Your project must include an Android Library module containing the functionality of your library. To create an Android Library module, first, create a new project in Android Studio.


Then add a new Android Library module.


2. Create a Bintray Account and Package
Once the Android Library is created, and the desired functionality is inside the module, you are ready to proceed with the building process. If you don’t already have an account, sign up for a Bintray, and then create a new repository for Maven distributions.


3. Edit Gradle Files and Upload to Bintray
To upload your Android Library files to Bintray, you’ll need to make some additions to your Gradle files and your local.properties file. Add the following to your project's build.gradle file:
repositories {
    maven {
        url 'https://maven.google.com'
    }
}

dependencies {
    classpath 'com.jfrog.bintray.gradle:gradle-bintray-plugin:1.8.4'
    classpath 'com.github.dcendents:android-maven-gradle-plugin:1.4.1'
}
You’ll need your Bintray API key for the next step.
In your local.properties file, add your Bintray username and API key as follows:
## This file is automatically generated by Android Studio.
# Do not modify this file - YOUR CHANGES WILL BE ERASED!
#
# This file must *NOT* be checked into Version Control Systems,
# as it contains information specific to your local configuration.
#
# Location of the SDK. This is only used by Gradle,
# For customization when using a Version Control System, please read the
# header note.
#Tue Jul 17 13:02:49 EDT 2018
ndk.dir=/Users/marisagomez/Library/Android/sdk/ndk-bundle
sdk.dir=/Users/marisagomez/Library/Android/sdk
bintray.user=<USERNAME>
bintray.apikey=<API_KEY>
Once that’s complete, create two additional Gradle files called bintray.gradle and install.gradle.


Add the following to your bintray.gradle file with your library's information:
apply plugin: 'com.jfrog.bintray'

version = '1.0.0'

task sourcesJar(type: Jar) {
    from android.sourceSets.main.java.srcDirs
    classifier = 'sources'
}

task javadoc(type: Javadoc) {
    source = android.sourceSets.main.java.srcDirs
    classpath += project.files(android.getBootClasspath().join(File.pathSeparator))
}

task javadocJar(type: Jar, dependsOn: javadoc) {
    classifier = 'javadoc'
    from javadoc.destinationDir
}

artifacts {
    archives javadocJar
    archives sourcesJar
}

Properties properties = new Properties()
properties.load( new FileInputStream("local.properties"))

// Bintray
bintray {
    user = properties.getProperty("bintray.user")
    key = properties.getProperty("bintray.apikey")

    pkg {
        repo = 'maven'
        name = 'com.example.androidlibrary
        configurations = ['archives']
        desc = 'An android library.'
        websiteUrl = 'https://github.com/cuttlesoft/android-library-example'
        vcsUrl = 'https://github.com/cuttlesoft/anroid-library-example.git'
        licenses = ["Apache-2.0"]
        publish = true
        publicDownloadNumbers = true
    }
}
Now add this to the install.gradle file, using the same process as above:
apply plugin: 'com.github.dcendents.android-maven'

group = 'com.example.androidlibrary'

install {
   repositories.mavenInstaller {
       pom {
           project {
               packaging 'aar'
               groupId 'com.example.androidlibrary'
               artifactId 'androidlibrary'
               name 'androidlibrary'
               description 'An android library.'
               url 'https://github.com/cuttlesoft/android-library-example'

               licenses {
                   license {
                       name 'The Apache Software License, Version 2.0'
                       url 'http://www.apache.org/licenses/LICENSE-2.0.txt'
                   }
               }

               developers {
                   developer {
                       id 'cuttlesoft'
                       name 'Marisa Gomez'
                       email 'marisa.gomez@cuttlesoft.com'
                   }
               }

               scm {
                   connection 'https://github.com/cuttlesoft/android-library-example.git'
                   developerConnection 'https://github.com/cuttlesoft/android-library-example.git'
                   url 'https://github.com/cuttlesoft/android-library-example'
               }
           }
       }
   }
}
Lastly, add the following to the bottom of your module’s build.gradle:
apply from: 'install.gradle'
apply from: 'bintray.gradle'

Now, you can run the following commands:
> ./gradlew install
> ./gradlew bintrayUpload
Once both commands finish successfully, refresh your Bintray account and you’ll see the new package.

4. Publish to JCenter
Select the project, and under the Linked to section, you can select Add to JCenter.

Fill out the comment, and hit Send.
You can now add your library to any project by including the JCenter link in the app’s build.gradle:
compile 'com.example.androidlibrary:androidlibrary:1.0.0'There you have it! Now anyone can add your SDK to their project easily, letting you deliver better Android integrations for your customers, or contribute Android's open source community.


